Mushroom spawn is the medium that you’ll be inoculating with mycelium. This article describes how to make grain spawn, one of the most common types of spawn used in the mushroom industry.
What you need:
- shiitake culture: on agar, as liquid culture or grain spawn.
- a pressure cooker that can reach 15 PSI.
- vessels such as glass jars, polypropylene containers or bags.
Types of Spawn
You have many different choices when determining what to use as spawn, the most common types of spawn is grain spawn. Many different types of grain can be used, the most common are wheat, rye and millet. Grain spawn is popular for a many of reasons:
- It’s high in nitrogen
- It’s cheap
- It’s fairly easy to get the hydration right
- It holds its form after being hydrated and colonised by mycelium
The other popular type of spawn is sawdust. Sawdust can be obtained from most sawmills or furniture workshops or you can use hardwood fuel pellets. Sawdust has the same properties as grain spawn except that it is low nitrogen, it’s basically all carbon. This means that if you use sawdust as spawn and want to maintain reasonable yields, the substrate that you’re inoculating needs to contain a higher nitrogen content. This can be done by adding supplements to sawdust such as bran or coffee grounds.
When hydrating your spawn, you want you want it to get to field capacity, but no more. If your grain gets too hydrated it can break apart in the pressure cooker. When your spawn gets mushy it makes it harder for the mycelium to colonise the grain, and harder to break it apart when you’re ready to transfer it. Likewise, if it’s under-hydrated, the mycelium will struggle to colonise it.
Preparing wheat grain
The are many different ways to hydrate your grain, the easiest is by soaking it in a bucket. The type of grain will determine how long you need to soak it for. In general, a 24 hour soak is good for most grain types (millet takes slightly less). Add wheat to a bucket, cover with water and leave it to soak for approximately 24 hours.
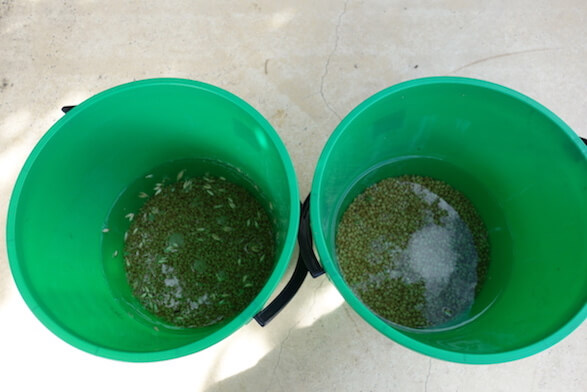
Soaking grain in buckets. On the left is grain used for chicken feed, on the right is organic grain from a health food store.
If you’re short on time, you can add your grain to boiling water in a pot and leave it to simmer for 20-30 minutes. With wheat/rye, you can check the grain periodically by squeezing it with your fingernail, if the inside is turning from white to transparent, it’s ready to strain and add to your jars.
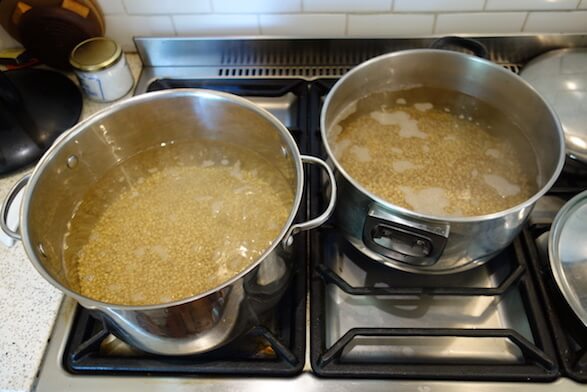
If you're short on time, you can boil grain to hydrate it.
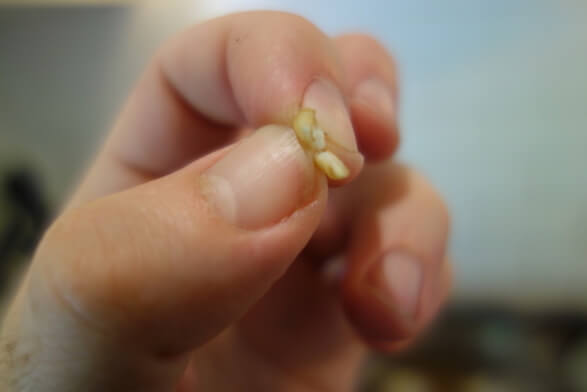
Checking the centre of grain to see if it's translucent.
After the grain is hydrated, you’ll need to drain it. I have a large sieve that I bought online, so I can drain several kilograms at once. I usually tip the sieve up on an angle and leave it to drain for at least 30 minutes if I’ve soaked it in a bucket. If you’ve cooked the grain on the stove, it will require less time to drain as the heat will evaporate a lot of the moisture away.
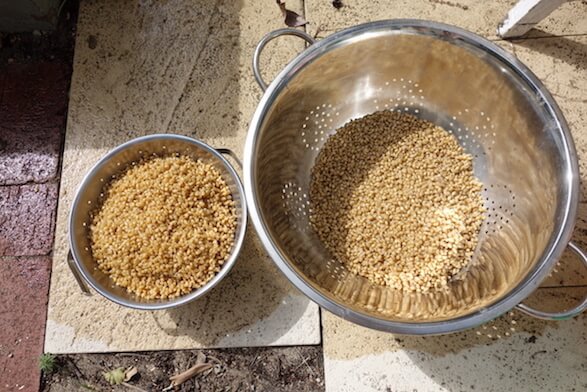
A large sieve is useful for draining large amounts of grain.
Adding to jars/bags
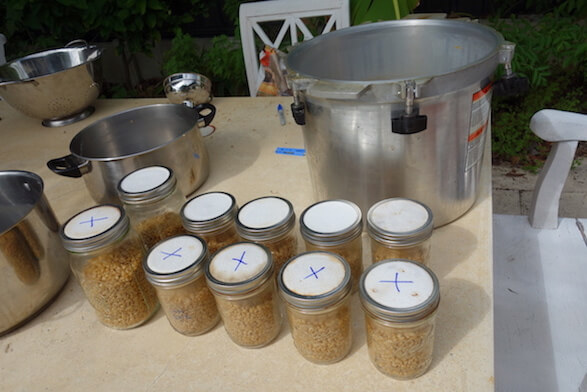
If you’re working on a small-scale, you’ll probably use jars for your grain spawn. Most people will use ball mason jars due to their shape, and because you can buy filter discs that will fit them nicely to facilitate air exchange. However, when you’re starting out, any jar will do, I find that the jars that hold salsa are a good size to work with.

Salsa jars are a good size for grain spawn. It's also a great excuse to eat some corn chips.
Your jars will need to have some holes in their lids, the mycelium needs air exchange to grow well. There are a number of ways to do this, by using filter discs, micropore tape, airport lids or pillow stuffing (ideally made of hydrophobic polyester).
These jars have hydrated grain in them and a filter patch on top.
If you’re using bags with a filter patch, they already have air exchange built in. When filling the bags, you want to fill them so that they’re a maximum of 1-2 inches (2-5 cm) below the filter patch. You don’t want grain to block the filter patch, and you want to leave enough air in the bag so that you can shake it.
Pressure cooking
Once your jars or bags are ready, you need to stack them in your pressure cooker. Make sure you read your pressure cooker instructions carefully and always remember to fill it with water so that at a minimum the water level is above the bottom plate.

Carefully read the instructions of your pressure cooker.
The amount of time that you’ll need to pressure cook for will depend on the amount of spawn that you’re pressure cooking. If you’ve only got a couple of jars, 60-90 minutes at 15 PSI is sufficient. If I have several small bags of grain, I will pressure cook for at least 2 hours and if the pressure cooker is crammed full of large bags, I’ll cook for 3 hours. You need to ensure that all of the grain gets to 121C/15PSI and it can take a long time for the centre of the bags to heat up enough to kill unwanted contaminants.
Adding a mushroom culture to your spawn
From liquid culture
The easiest way for home cultivator to create grain spawn is by using a liquid culture starter. The reason for this is that you don’t need a sterile environment to perform inoculations. You will need to use airport lids on your jars so that you don’t expose the sterilised grain to air that contains potential contaminants.
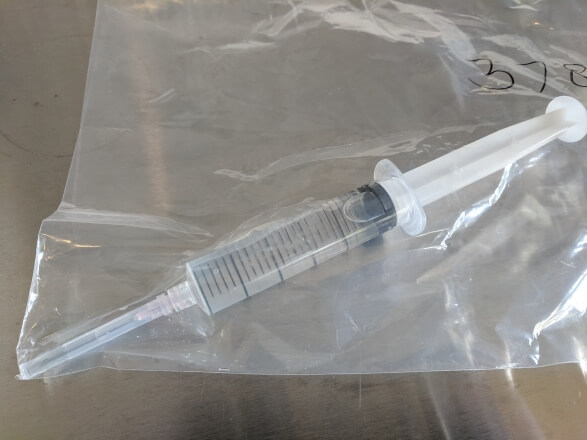
Liquid culture syringe with shiitake 3782 mycelium.
Gather your liquid culture syringe, an alcohol wipe or alcohol spray bottle and your jar with airport lid. Shake your liquid culture syringe to break up the mycelium as much as possible. If it’s not your first time using this syringe, hold the needle under a flame (lighter/alcohol lamp) until the needle goes red hot, then squirt a tiny amount of culture out of the needle to cool it down.
Spray/swab the injection port of your lid with your alcohol and then insert your needle through the port and inject a couple of millilitres of liquid culture into the jar.
From agar
If transferring from agar, you’ll need to do this in a sterile environment, either in a still air box or in front of a flow hood. If you’re starting out, you’ll probably be using a still air box, since they’re cheap and easy to make.
Only a tiny amount of agar needs to be added to your grain spawn, in most cases I’ll divide the whole plate between several jars. You can cut your agar with either a sterilised scalpel or dental pick. I find that a dental pick is better when transferring from agar to agar or agar to slant and a scalpel is better when transferring to grain spawn. In your sterile environment, quickly open your agar plate and cut the plate into wedges then cut around the side of the plate. Stab into a wedge and add it to a jar with as little exposure to the air as possible.
Expanding from grain spawn
This is probably the quickest and easiest way to expand your culture. If you have a jar or bag that already contains colonised grain spawn, you simply need to break a little bit off the colonised spawn and add it to your sterilised grain.
Typically you’ll do this if you need to create a lot of spawn. First, you’ll create some grain spawn in a smaller jar, this will be your generation 1 master (G1) spawn. Once the G1 is colonised, you’ll sterilise grain in many more containers and transfer a small amount of the G1 spawn into each of them to create G2 spawn. Typically you can expand your grain spawn by 10-20 times when performing grain to grain transfers. This means that if you start with 1kg of grain spawn, you can expand it to 10-20kgs of spawn.
Next: Working with Cultures