You’ll hear the word substrate used a lot in mushroom cultivation. Simply put, it’s the medium that your mycelium will be growing in. Usually, this will be some sort of natural waste product such as straw, wood chips, sawdust or even paper. When people refer to “fruiting substrate”, the intention of the substrate is produce mushrooms. Alternatively you can produce substrate to expand it to more substrate rather than fruiting it directly.
To get started, at a minimum what you’ll need is:
- a pressure cooker
- a container to hold the substrate in (usually filter patch bags)
- a source of sawdust/woodchips, bran
Recipe
For most of my shiitake grows, I use eucalyptus sawdust (usually blue gum fines) and wheat bran for the substrate. Most kinds of hardwood sawdust will work well, ideally they’ve been aged a bit (not too green) and are a good size. I find that “fines” are an ideal size, but if you’ve got a mixture of coarse and really fine sawdust it works well too. If your sawdust is as fine as powder, it will get waterlogged and the mycelium will take a long time to colonise it as there isn’t enough air space between sawdust particles. If your sawdust is too coarse, there will be too much air space between particles affecting your yields and it’s also harder to pack into bags without puncturing them.
Hydration
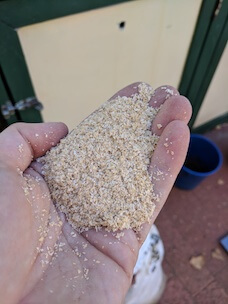
Getting the right hydration for your substrate is very important. Too much or too little water and your mycelium will take longer to colonise or your yields will be lower. It’s usually better keep your substrate on the drier side, as waterlogged substrate has a tendency to contaminate more easily. To test if your substrate has the right amount of hydration (known as field capacity), the recommended way is by doing a squeeze test. To do this, pick up a handful of the hydrated sawdust and squeeze it as tightly as possible, only a few drops of water should drip out; more than a few drops and you’ve hydrated it too much. If there’s still dry patches and no water coming out you’ll need to add a little more water.
For my setup, I find that a good ratio is 1kg of sawdust, 250grams of wheat bran and 1.6L of water. For a typical dry sawdust you’ll need approximately 1.5L of water to 1kg of sawdust. If you’ve got a consistent supply of the same type of sawdust, a good way to work out the right amount of hydration is by using some kitchen scales. Get your scales and weigh out 100 grams of sawdust into a container and then add 100ml of water. Stir the mixture and keep adding a small amount of water (maybe 10ml at a time) and give it a squeeze each time you add water to see if it’s a field capacity. Once you’ve worked out the right ratio, you can use that ratio when you’re weighing out larger amounts. I find that bran only requires about 250-500ml of water to 1kg of bran.
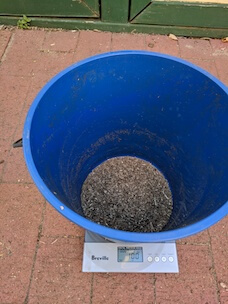
Finer bluegum fines
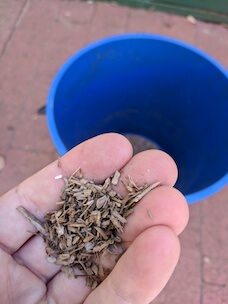
Close up of finer blue gum
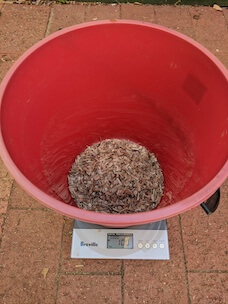
Coarser bluegum fines
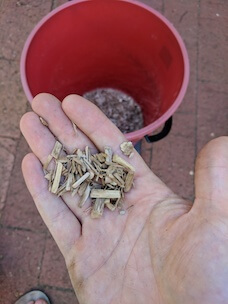
Close up of coarser bluegum fines

30kg Bag of flaky bran
Flaky bran consistency
Mixing and preparing bags
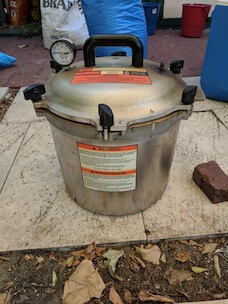
When making bags, I usually make 6 small bags at a time. This amount fits exactly into my All American 921 pressure cooker. Each bag contains 500 grams of sawdust, 125 grams bran and 800ml of water. I weigh out 3kgs of sawdust into an esky (insulated foam container), add 750 grams of bran on top and then mix it thoroughly before adding 4.8L of water. Once I’ve added the water I mix it all together until there’s no water at the bottom of the esky. I then distribute the mix evenly into all 6 bags.
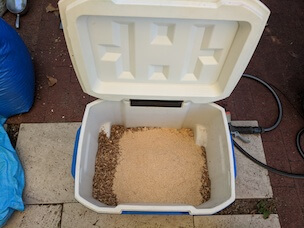
Sawdust and bran dumped in the esky
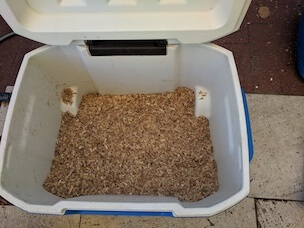
Mix well while still dry
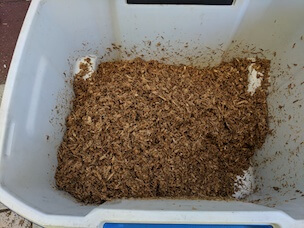
Add water and mix well
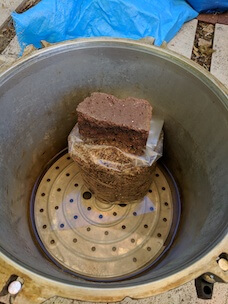
I stack the bags in the pressure cooker in 2 layers of 3 bags, I don’t seal the bags in any way, I just fold them in on themselves with the filter patch facing upwards. Once you’ve pressure cooked the bags and let them cool, the bags will vacuum seal themselves as the pressure cooker loses pressure.
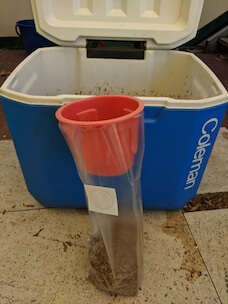
A small bucket with the bottom cut off can be used as a funnel
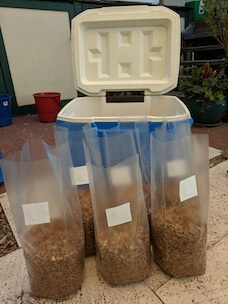
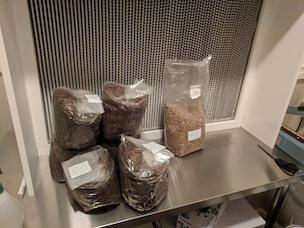
Six bags filled with substrate
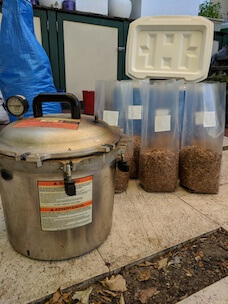
6 bags ready to go in the pressure cooker
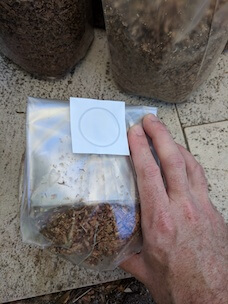
Fold the filter patch bags so that the filter is on the outside.
Having a weight to hold bags down while you stack can be useful.
I place 3 bags per stack in the pressure cooker
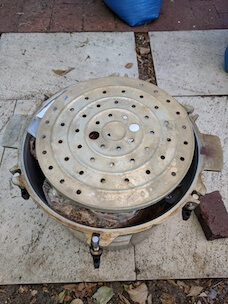
Very tight squeeze in the pressure cooker. The top plate keeps the bags from blocking the outlet.
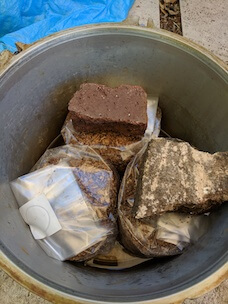
All the bags have been squeezed into the pressure cooker
I sterilise the bags for at least 90 minutes at 15 PSI, but I usually do it for 2 hours and rarely get any contamination. I usually sterilise the bags in the evening and allow them to cool overnight to inoculate the next day.
Moving bags to spawn area
After your bags have cooled, you’ll need to transfer them to a sterile work area to add spawn to them. For many years, I used a still air box to do this, but if you’re going to step up production, you should look into buying or constructing a laminar flow hood.
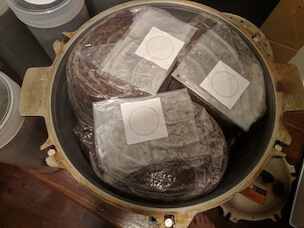
Bags get vacuum sealed by the pressure cooking process
Bags are ready to inoculate in front of a laminar flow hood.
Creating a still air box (or glove box)
A still airbox (SAB) is a large container with two holes in it to put your arms through. They’re easy to make, the easiest way is to buy a large plastic storage container from a hardware store and then use a hole-saw attachment on a drill to make two holes for your arms to go through. You want the holes to be big enough to get your arms through and manoeuvre around a bit, but no bigger. The air all around you is full of bacteria and competitor fungi spores. The goal of the still airbox is to create a work area where airflow is restricted so that a minimal number of these contaminants can get in.
Try to find a container made of very clear plastic, the cheap ones are clear but slightly opaque and it makes it harder to see through them, especially when it gets humid. The really clear ones will probably cost you about $20-$25 AUD for an 80L container.
Inoculating bags
If you’re inoculating in a still air box, I find that doing 3 bags at a time allows you enough room to manoeuvre and also fill the bags with spawn. The small bags are a good size if you’re using a SAB, if you’re doing big bags it’s a pain to open the bags and tilt them enough to tip some grain spawn in because you have limited space. When working in a SAB, I prefer spawn in pint sized jars, quart jars are a little too big and it’s really hard to tip out the last bit of spawn out into a bag. One pint jar of spawn can easily do 6 bags, try to pour an approximately equal amount of spawn into each bag.
Once you’ve poured in the spawn you can seal the bags with either an impulse sealer, or you can very carefully seal them using paper clips or alligator clips. With paperclips, try to get the gussets on the side of the bag as flush as possible and then do at least 3 small folds from the top of the bag downwards, each fold a couple of centimetres in length. Hold the fold with one hand while putting the paperclip on one side of the bag and then put another two paper clips over the folds, one of the other side of the bag followed by one in the middle of the bag.
If you’re using an impulse sealer you’ll probably need to get the bags out the SAB to seal them. I still use paperclips when I do this, I’ll do a single fold of the bag, put on 2 paper clips and then bring it over to my impulse sealer to seal it properly and then remove the paper clips. To make sure the bag is sealed properly give it a gently squeeze and make sure it doesn’t deflate. If it deflates, find the hole and re-seal.
Colonisation
Typically, shiitake take 8-12 weeks to fully colonise and then turn brown. Shiitake are unique in this aspect, most other types of mushroom are considered fully colonised when they’re completely white but shiitake will slowly start to turn brown and form small bumps. Once the block is mostly brown, it’s ready to be fruited.
It’s possible that your blocks will start fruiting prematurely, you’ll see mushrooms forming under the plastic while the block is still white. If the bag isn’t very brown, I leave the mushrooms in there until it gets browner and then rip these premature mushrooms off when I open the bag. If the block is mostly brown, I’ll wait until the mushrooms get to a size where they’re a few days away from harvest and then I’ll open the bag. These mushrooms will generally turn out ok, they’ll be a bit flattened from being squished in the bag but will still taste great.
Next: Preparing Spawn